How-To
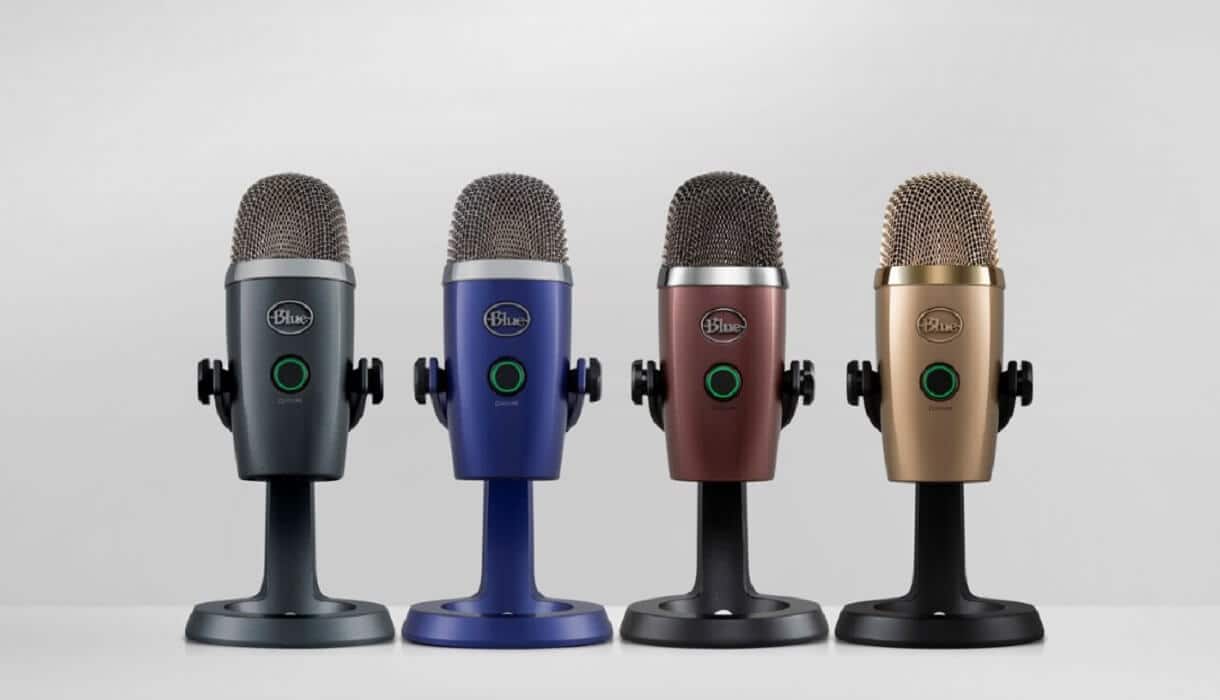
How to setup a Blue Yeti microphone
Having issues with your Blue Yeti microphone? This is a good place to start.
Live streaming is big business, with more and more people thinking they can be the next big thing. That means you’ll need a good starter microphone, and the Blue Yeti is one of the best.
It might not be the best overall, but the Blue Yeti setup is the best for most people starting out. After all, you don’t want to over-commit before knowing if you enjoy streaming.
There are many other USB microphones for streaming. Many successful streamers move onto an XLR microphone set up with an interface like the Presonus Revelator io24.
You don’t need to spend that much money at the beginning. The Blue Yeti microphone is among the best budget microphones for streaming.
We’ll explain why and how to set it up and use it properly.
A brief detour
OK, I know you want me to go straight to the facts. But before I do that, I need to give you some general facts about the Yeti Pro stereo microphone.
The Yeti microphone from the Blue Microphones family is typically advertised as the world’s No. 1 USB microphone that can be used for all sorts of things. Still, advertising is one thing, and practice is another.
However, as someone who’s had the Blue Yeti USB microphone for quite some time, I can safely say it’s good for all your purposes. Nay, excellent.
I’ve used it for recording, streaming, gaming, and video calls. Hell, my sister even used it for some of her blog videos. This thing gets the job done! I’ll stop praising it right now and will focus on some facts.

Specs and key features
I’m sure you checked these already if you considered purchasing a mic as an addition to your gaming equipment. However, repeating it here so you have all the facts together can’t hurt.
USB cable Yeti Pro stereo microphone specs
As for the Yeti stereo microphone belonging to the condenser microphones group, you’ll need to consider these.
- Dimensions (with corresponding stand): 4.72″ (12cm) x 4.92″(12.5cm) x 11.61″(29.5cm)
- Weight (yeti mic): 1.2 lbs (.55 kg)
- Weight (stand): 2.2 lbs (1 kg)
- Polar Patterns: Cardioid, Bidirectional, Omnidirectional, Stereo
- Required Power / Consumption: 5V, 150mA
- Sample Rate: 48 kHz
- Bit Rate: 16-bit
- Frequency Response: 20Hz – 20kHz
- Capsules: 3 Blue-proprietary 14mm condenser capsules
- Max SPL: 120dB (THD: 0.5% 1kHz)
As we can see, the Blue Yeti or the Yeti microphone ain’t that compact. It will take up some space on your desk, so you need to plan carefully where you’ll put it.
Even though it is mostly recognized as a Yeti stereo microphone, the Yeti mic works in different polar patterns. Let me explain. (Briefly, I promise!)
Polar patterns of the Blue Yeti mic

If you have any uncertainties about these, then know that this is the space around the mic capsule where the mic is most sensitive to sound sources. In layman’s terms, this is where the mic gets sound from or sends it to.
If you wonder why this is important to you as a gamer, think about this – you have to know this to set up the microphone properly later on.
The Yeti Condenser Mic operates in four different modes, as indicated in the specs above.
- Cardioid mode – means that the mic is the most sensitive at its front side, lesser to the sides, and the rear is completely disregarded. This mode is the best for gaming cause you’ll have to speak directly into the mic.
- Bidirectional mode – I think the name says it all. The sound goes two ways. Great for interviews.
- Omnidirectional mode – Yeah, exactly, the sound comes from and goes in all directions.
- Stereo mode – this would be your best option when you need the clearest possible separation of sounds from the left or right side.
As you can see, the yeti pro works in all modes. Still, the cardioid mode will most likely be your first (and best) option for gaming purposes.
Other features
Now that I’ve introduced you to the microphone specs and functionality features, let me share a few more details, so you can better understand later how to set up the Blue Yeti mic.
Headphone jack with volume control
Among a variety of USB microphones (plugged in through a USB cable) that you opt for, always make sure that it has a headphone jack.
This will be highly useful if you want to, let’s say, monitor the recording or stream without any delays (of course you want).
Another reason why I like these blue microphones (Yeti) is that they feature the headphone volume knob right on the front, so it’s easily accessible and you don’t have to pause your gaming session.
Mute button
Ah, this is a great one! You get excessively annoyed and don’t want the audience to listen to your ranting; well, just mute the microphone.

Yeti Pro has this excellent feature/button followed by a red LED that flashes when the microphone is muted. When the microphone operates normally, the LED signal will be constantly on.
Gain control
For the unaware ones, when we talk about mic gain, we are talking about microphone sensitivity. On the Yeti Pro stereo microphone, this feature is controlled by a gain knob at the back of the microphone.
In most cases (i.e., other microphones connected via USB cable), you must use a software app to regulate the gain. Luckily, the gain knob is already included with the Blue Yeti microphone, so you have quick access.
If you aren’t sure why this is important, imagine a sudden background noise. In this case, turn the gain knob down, diminish the background noise and avoid peaking and overloading your microphone.
You’re welcome!
Plug & Play
Did I mention before that Blue Yeti or the Yeti stereo microphone is connected to a PC by a simple USB cable?
Why, of course, I did! Now you will ask why the heck is this relevant. Well, for one…you will need no drivers or software to use Blue Yeti. Yeah, it’s rather simple to set it up, is what I’m trying to tell you.
Once you plug the USB cable into the right USB port, select Yeti stereo microphone from the audio settings, and you’re good to go.
And, for those who want more from their Blue Yeti, Blue also offers software that enables you to get various microphone updates (gain, pick up, etc.).
Is any additional power needed?
No. If you wondered whether our little yeti requires any phantom power, I am more than thrilled to say No. The cable it comes with does all the job, so you’re good.
Now that we’ve dealt with the facts and details of the blue yeti mic, it’s finally time to deal with the blue yeti microphone settings. Let’s go.
How to set up the Blue Yeti

You already have some ideas about what happens after you plug the microphone cable into the correct USB port. It’s setting up time! So, how do you do it?
You can’t help but think about whether system preferences have any impact. Do you need any software, et cetera? Naturally, you need to set up the hardware and software with any microphone, Blue Yeti included. One step at a time!
Hardware setup
I mentioned multiple times throughout the text that our Blue Yeti is plugged in via a USB cable. In practice, we’re talking about a typical plug & play microphone with a PC and Mac system.
Accordingly, this member of the Blue microphones family is compatible with MAC OS X (10.4 and higher), XP Professional, Windows 7 and higher, XP Home Edition, and Windows Vista.
In terms of hardware settings, plug the USB cable of the Blue Yeti into the USB port. That’s it; now it’s ready to use.
Software settings
Before I go into details, there is one thing I need to point out. Many articles on how to use the Yeti Mic say to download the drivers and restart your computer.
However, this isn’t true. The Yeti stereo microphone works without these. Now, after you’ve plugged it in, let’s see the next steps.
Setup Example – Windows
The setup process for any version of Windows is similar. I will not waste your time by going through the variations.
After successfully plugging in the Yeti mic, your next step will be to get to the control panel through the Start menu or the Charms bar.
Once you open the control panel, click or double click Hardware and Sound or just Sound (represented by the speaker icon). After you select Sound, select the playback tab first and right-click on Speakers BLUE Yeti.
Set it to Default Playback Device and Default Communication Device.
Right-click on Speakers BLUE Yeti, click on Properties, then Advanced. Uncheck the box next to “Allow applications…”, click on Apply, then OK.
Some Windows software will require setting Yeti as default under the playback tab.
Then, click the recording tab and choose Yeti stereo microphone. Some Windows products require you to set Yeti as default in the recording tab. After you’ve done this, press OK, and that’s about it.
Setup Example – Mac
Just for the sake of comparison, these are the steps you need to follow in the case of mac. Once the USB cable of the Blue Yeti microphone is connected, you need to click the Apple menu and then click System Preferences.
After this, select sound (as represented by the speaker or sound icon), and in the output tab, choose Yeti stereo microphone.
Repeat the procedure in the input tab (click it, select Yeti microphone as a device for sound input) and exit preferences. You and your Yeti microphone are now all set!
Setting Up Blue Yeti Mic for Streaming

Cause that’s what we’re here for! As said in the intro section, streaming without a microphone isn’t complete, whichever of the streaming software we’re talking about.
The audience wants and needs to hear your ranting when facing the latest overlord (and being beaten by it). If you mean business, such streams will attract more audience, so good for you. Here we go – step by step!
Choose the right mode
If you aren’t sure which one that is, cardioid is the one to go for.
I explained all the modes in which the Blue Yeti operates, but this mode is the optimal setting (audio-wise) for streaming with the right sound quality for your audience.
You will find the knob that regulates modes at the back of the microphone, so just set it at a seemingly heart-shaped symbol. This one represents the sound and audio reception and distribution ways, so your audience can hear you properly.
Regulate noise sources
Clean audio without an undesirable sound source is a prerogative. For example, you’re fully committed to a quest, and your audience is all engaged in your narrative.
Instead of only hearing your voice and your game, they also hear your keyboard clacking. Such a turn-off!
I will assume that you’ve set the mode to cardioid, which is excellent at “ignoring” these side sounds. However, if you still think some ambient sounds might be an issue, you better take care of it. Is a clock ticking? Just remove its batteries. Better safe than sorry!
Speak into the side of the mic
You should always speak to its side, whether the mic is attached to a recording device or gaming equipment. Yes, you need to speak into the dome – not into its top, but into its side where you see the Blue logo.
This is the definition of a side-address microphone, seeing how Blue Yeti is one of them.
For example, if you were to use the Blue Yeti to make a recording of you playing the guitar or any other musical instruments, you would also place the mic, so the front side (where the headphone jack and mute button are) faces the instrument.
Mind the gap!
Yeah, the distance is crucial. You don’t want to be too close (you’ll kill the audience with (ex)plosives), but you don’t want to sound distant either.
The tolerated distance is 4 to 10 inches (100 mm to 250 mm), but the ideal one is 8 to 10 in. (150-200 mm).
If you are within this optimum range, your audio recording will be clearer since you can turn the gain at the lower values, and the background noise will be eliminated.
Seek more gain
And ye shall be given! Ever heard of people complaining about their sound, i.e., audio recordings sound bad? That’s because they can’t set the gain right. It’s sad, but it’s true.
Some might say the more, the merrier, but in the case of gain, the higher gain level is better for the recording studios where all the background and ambient noise is eliminated.
Seeing how most of you will record and stream from your home to make great audio, the practice shows that turning the gain knob halfway between the minimum and half the strength is best.
The proper sound source (in your case, sources) will be a-plenty, and the gain regulation will help you here.
Let’s say you turn the gain to the highest. In this way, Yeti will pick up ALL the sounds, leaving one big mess and too much sound to be processed.
This is why you should turn the gain to a quarter of its pre-designed gain levels and eliminate any redundant audio input with such an optimal setting.
Make your Yeti soar
Seriously, take it off of your desk! You bump your leg on the desk, and the cooling fan vibrates. You fidget on the chair and clack away on the keyboard – this is the unnecessary noise inevitably picked up by Blue Yeti.
The consequence is the audio recording of poor quality with plenty of impurities. Most of these issues are solved by lifting the mic, and you are left with impeccable audio recording.
The best thing of all – the mic already has the required mounting holes, so you don’t have to make science about it.
Give a shot to Blue Sherpa
Seriously, this companion app is an excellent addition to your mic. Besides allowing the mic to update at regular intervals, it will also help you establish better control over monitoring levels and gain.
Of course, the final result will be an audio recording of higher quality.
Use protection
For your mic, dummy, I’m talking about your mic. When you make an audio recording of any kind, you want it to be as clean as possible. You also want all the sounds you pronounce to be heard equally.
I am referring to the plosives issue – t, d, p, and b sounds. These are a blast! To get a clean sound and protect the ears of your listeners, the Blue Yeti already has the mic grill installed.
But, take my word, this won’t suffice. Get a pop filter and get it now. This will diminish the strength of plosives and make your audio and sound recording more pleasing to the ear.
Get headphones too
This output device will be a welcoming addition since it will help monitor your sound. See it as self-criticism.
It’s better to monitor your audio recording yourself and see if you’re making any mistakes than to see a comment about how your streams are great but your audio sucks.
The headphones will help you check the playback and output volumes, so you know what’ll work best for your audience. Practically, you’ll be one step ahead.
Test, test, and ALWAYS test
Seriously, before you go recording live with the latest Blue Yeti stereo mic, make sure to run a trial recording. I ain’t kidding.
This will tell you if you set the mode right, if the gain is at the right level or if the mic picks up more than it should.
Also, you will know if the pop filter is doing its job. So, a test recording is your best friend in this case.
Final word
So, my friend gamers, if you wondered whether the Blue Yeti is worth it and whether it does the job, I believe I helped you draw the right conclusion – it is, and it does.
Most of all, I was happy to share with you how to set it for use generally and how to set it up for live streaming cause that’s why we’re here. Now, grab one Blue Yeti and give your audience memorable audio!
Have any thoughts on this? Let us know down below in the comments, or carry the discussion over to our Twitter or Facebook.
Editors’ Recommendations:
Editor’s Note: Stefan is a long-time content creator and one of Stream Mentor’s co-founders. He’s a tech geek and a Dota 2 player (not even good) who wanted to help others become professional streamers and earn from the comfort of their home.
Follow us on Flipboard, Google News, or Apple News


Buying Guide
The best wireless earbuds (2023)

Buying Guide
Here are the best STEM toys on the market today


Powerful ideas in 15 minutes
Join now and start upleveling your small talk game. Get access to over 5,000 book titles alongside 20 million other readers.
Trusted by 80,000+ businesses globally.
Elevate your scheduling with Calendar.com, your ultimate team tool. Create custom time slots, share your unique link, and let contacts book meetings with ease.
Turn your Airtable or Google Sheets into modern business tools you need.
Softr lets you stop waiting for developers. Build software without devs. Blazingly fast. Trusted by 100,000+ teams worldwide. Stop waiting for developers..

Learn AI in 5 Minutes a Day
We'll teach you how to save time and earn more with AI. Join 70,000+ free daily readers for trending tools, productivity-boosting prompts, the latest news, and more.